8 Changing a Sender App Name and Icon
To change the name or icons of a registered sender app, create a new ZIP file on the admin site and update the target sender app in the Teams admin center.
This page describes how to change a sender app. To change the main app, see Chapter 6, Customizing App Name and Icon.
To add a new sender app, see Chapter 7, Setting up Additional Sender Apps.
Create the updated ZIP file
A NewCommunicator app administrator performs these steps.
-
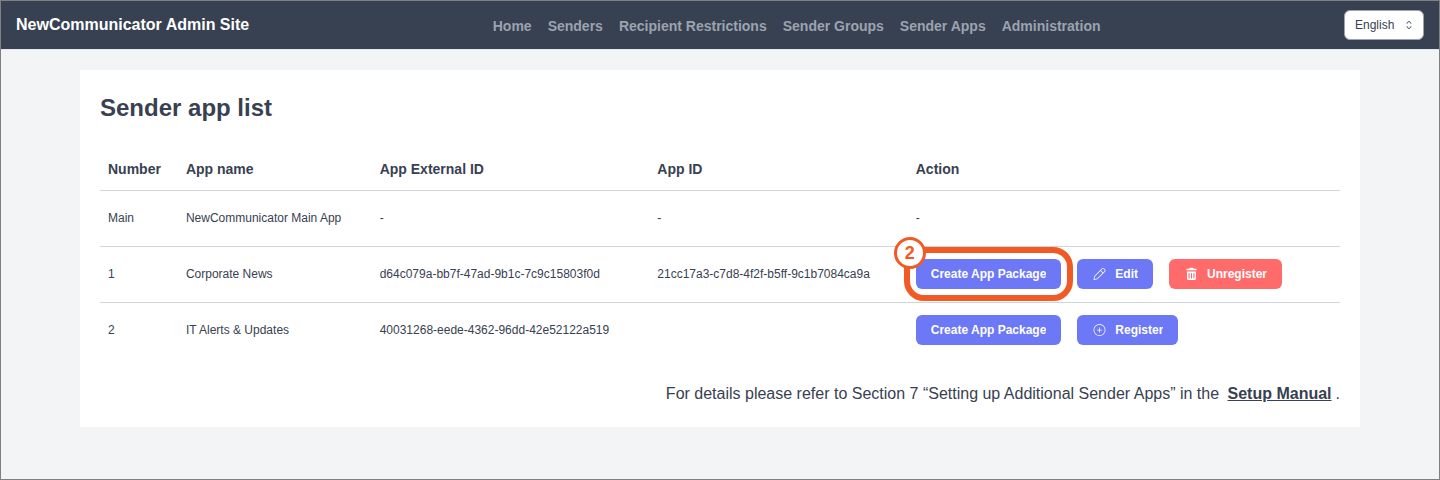
Open Sender Apps.
-
Select Create App Package for the registered sender app you want to change.
-
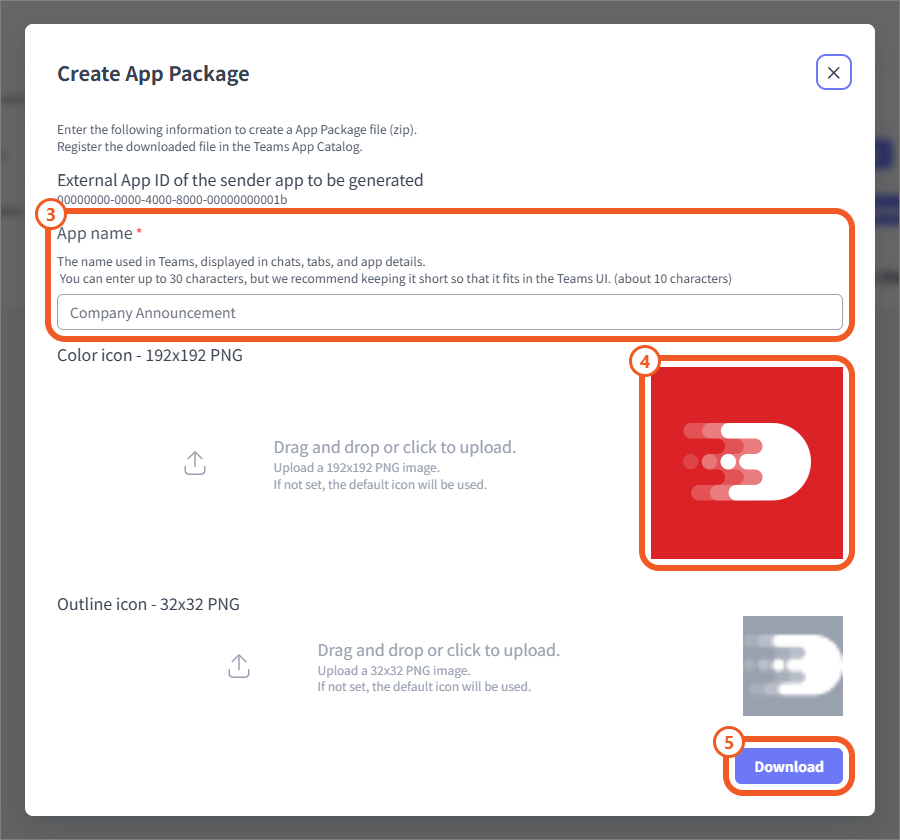
Enter the app name to display in Teams after the update. If you are changing only the icons, enter the current app name.
-
To change the icons, specify a 192 × 192 pixel color icon and a 32 × 32 pixel outline icon. If you do not specify icons, the default icons are used. To keep the current icons, specify the same images.
-
Select Download to save the ZIP file.
App names can contain up to 30 characters. The ZIP file is created in the same way as in Chapter 7.
Always create the ZIP file from the sender app you want to change.
Update the sender app in the Teams admin center
A Microsoft 365 global administrator performs these steps.
-
Sign in to the Microsoft Teams admin center.
-
Open Teams apps → Manage apps.
-
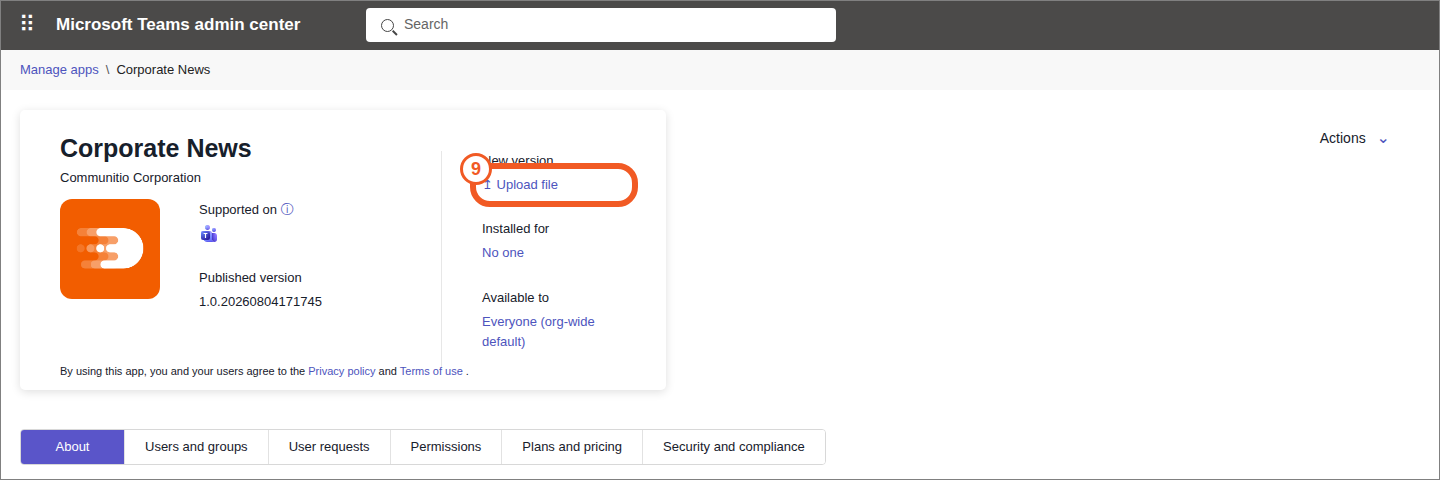
Search for and open the sender app you want to change. Search using the current app name and confirm that you have selected the correct app.
-
On the app details page, select Upload file and upload the ZIP file you created.
-
Check the updated app name and icons.
Change the app name on the admin site
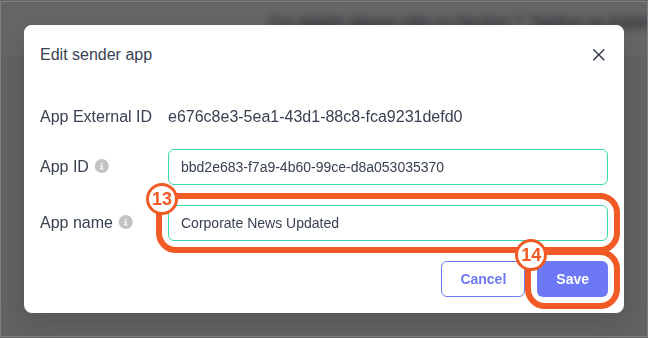
If you changed the app name, a NewCommunicator app administrator also updates the registered name on the admin site. This is not required if you changed only the icons.
-
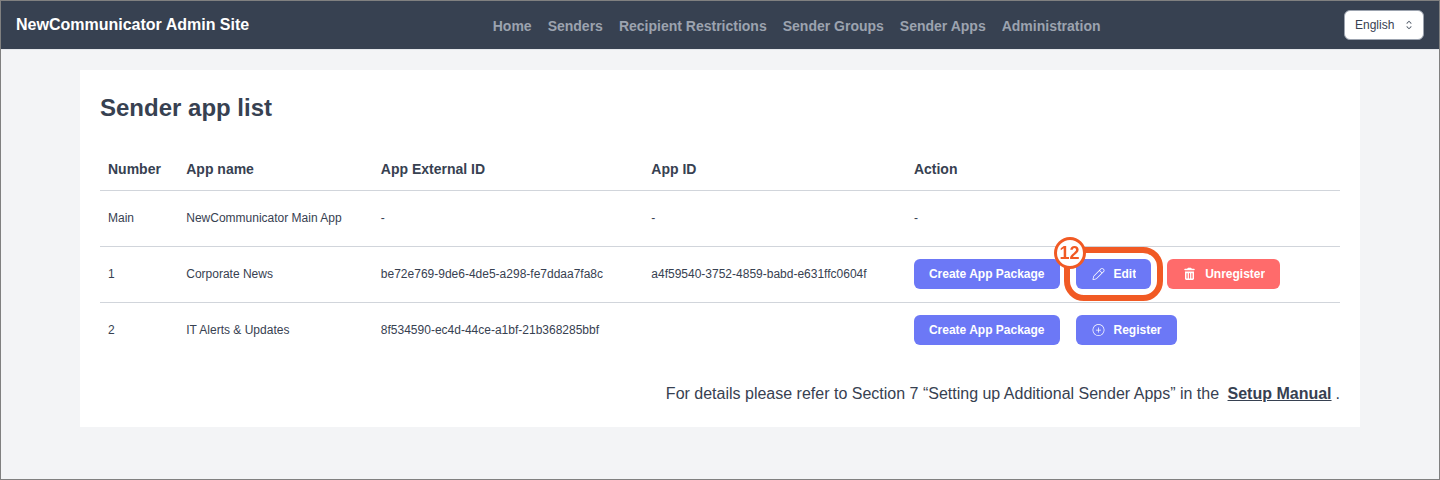
Open Sender Apps.
-
Select Edit for the registered sender app.
-
Change the app name to the new name.
-
Save the changes.
Editing the app name on the admin site alone does not change the app name or icons in Teams.